Pensacola & the Florida PanhandleRoof concerns after Isaias? Start here

A LOOK INSIDE YOUR FREE ROOF REPORT

Damage you can see.
Next steps you can use.

Clear images. Specific findings. A practical repair plan. Explore this complete sample to see how a written report can help you understand your roof.

Download 8-page sample

SAMPLE PROPERTY · SAMPLE-123

123 Main Street

Asphalt-shingle roof · Six illustrated findings

Repair evaluation recommended

Fictional sample property. All six images are AI-generated illustrations of example defects, not photographs from an inspection. Locations are illustrative; no property has been assessed.

05Roof defects
Prompt repair evaluation
01Gutter defect
Scheduled repair
08Pages in the PDF
Summary, images & next steps

THE FINDING RECORD

A closer look at each issue.

Each finding connects the visible condition with its significance and a recommended action. Locations below are example references.

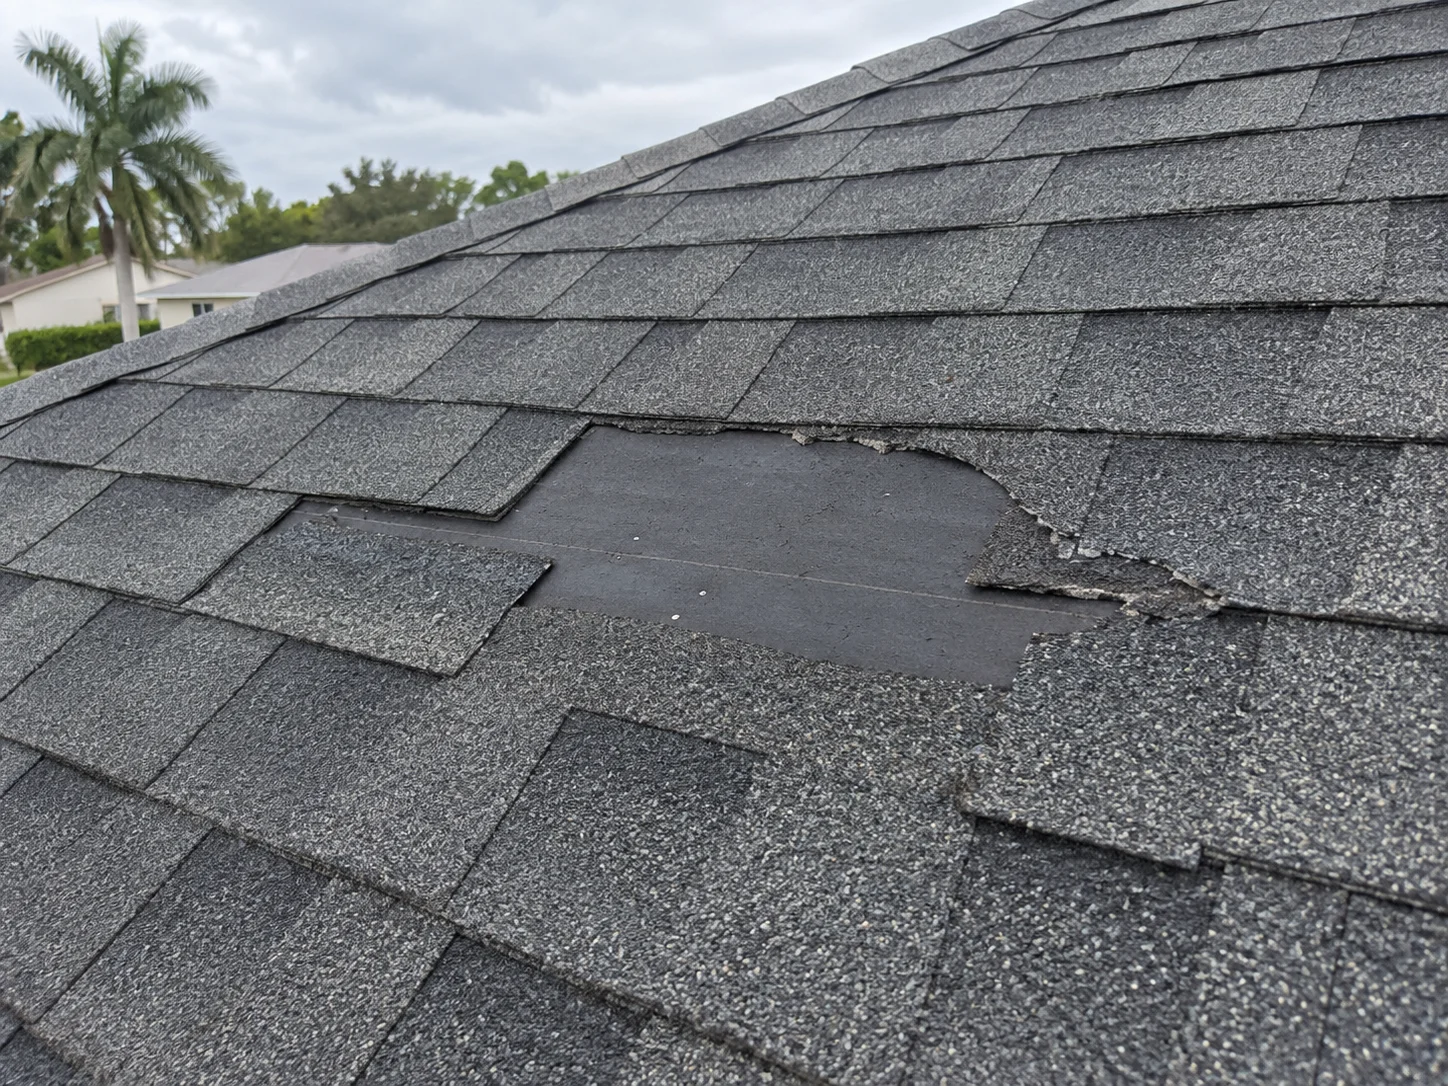
AI-generated example of missing charcoal shingles with a dark underlying layer exposed.
IMAGE 01 · AI-GENERATED EXAMPLEAn exposed patch interrupts the granulated shingle surface.
FINDING 01Prompt repair

Missing shingles

Front slope · lower field · Example location

Visible condition
Shingle material is missing from a localized section of the slope. A smooth, dark layer beneath is exposed, with torn edges around the opening.
Why it matters
The primary roof covering is interrupted. Water can reach underlying layers that are normally protected by the shingles.
Recommended next step
Have a roofer assess the exposed area and surrounding shingles, then replace damaged materials with compatible products. Confirm the underlayment and decking condition when the area is opened.
What to verify during the repair

Confirm the affected area, material compatibility, fastening and sealed overlaps. Record completion photos before and after the covering is restored.
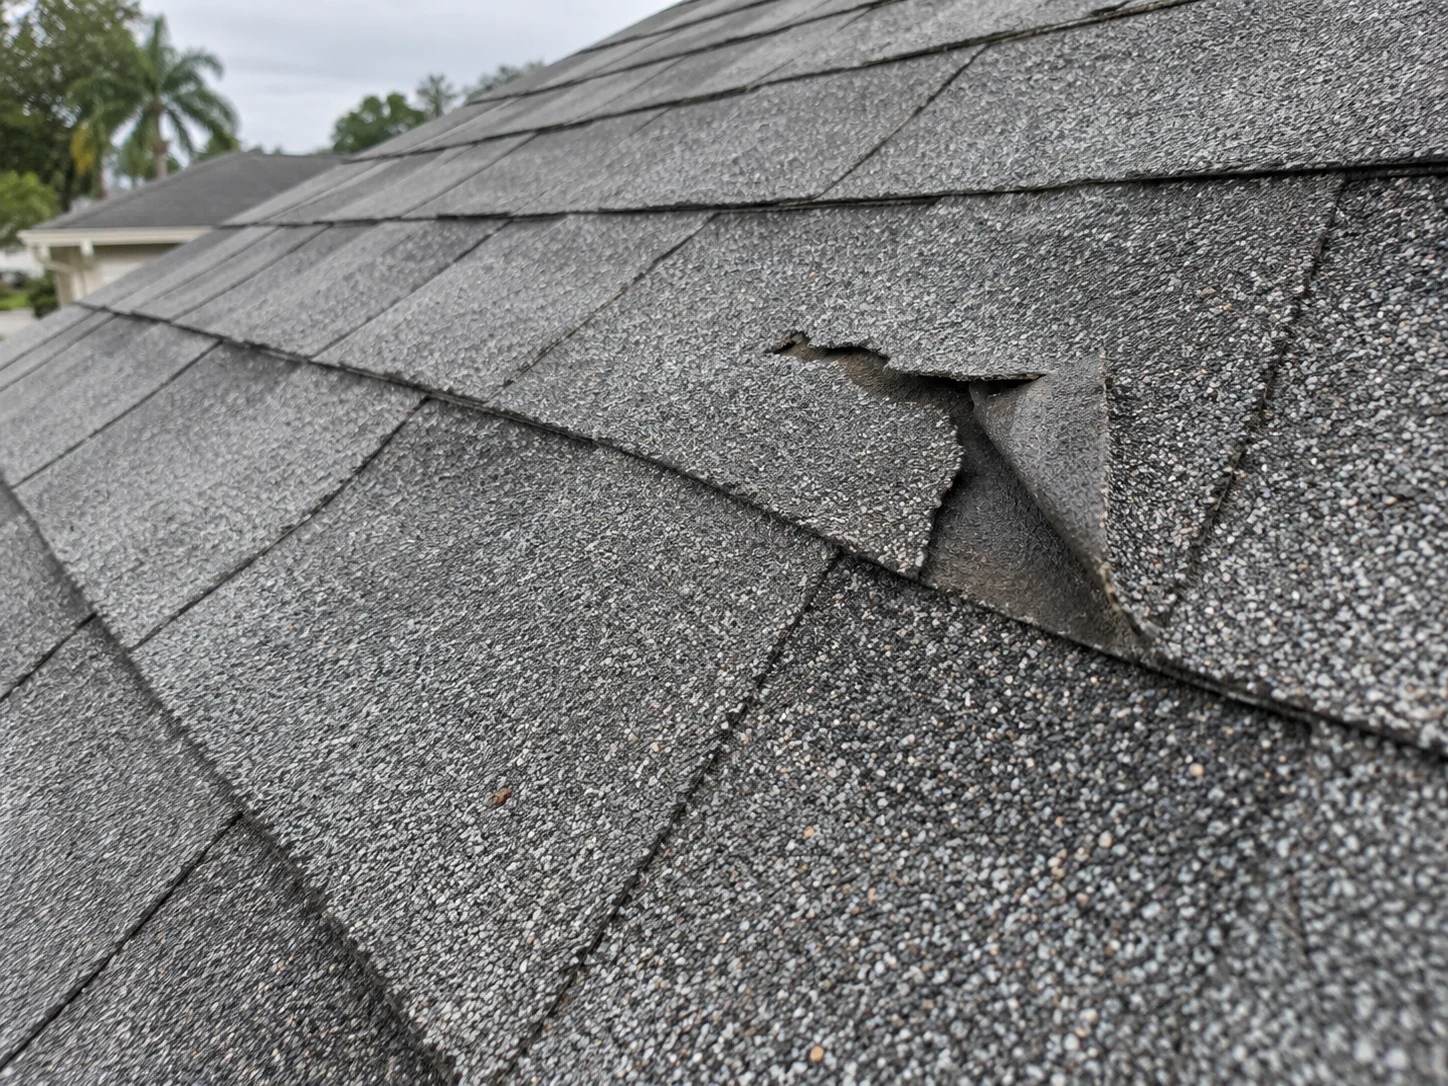
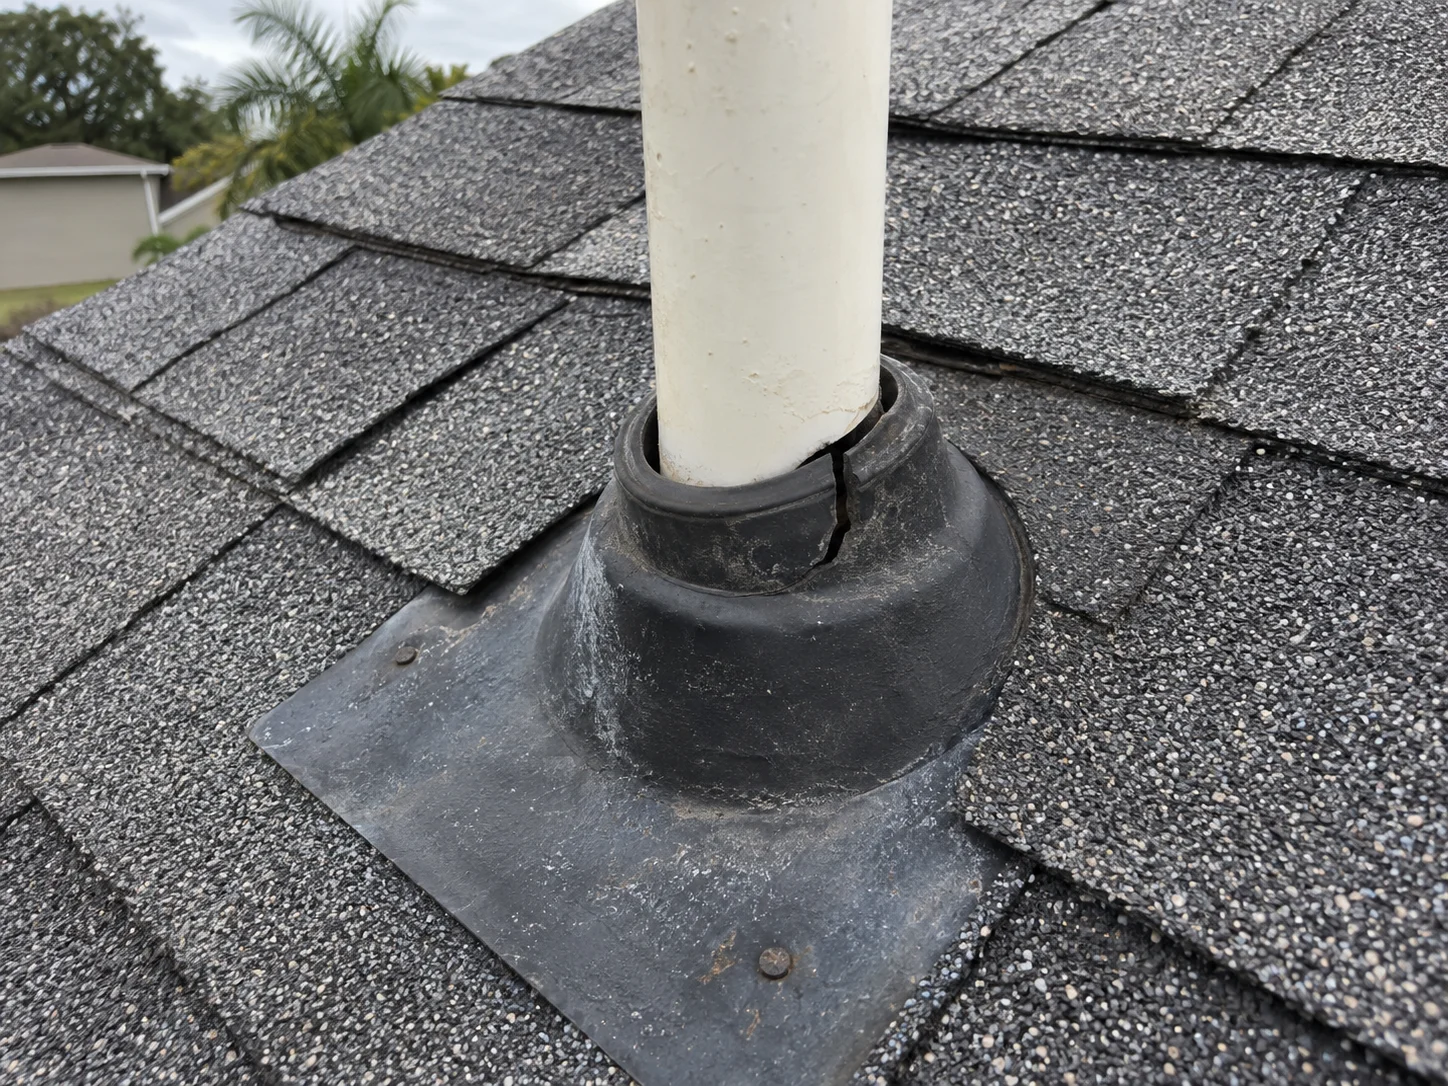
AI-generated example of a shingle torn across its body with its broken corner lifted.
IMAGE 02 · AI-GENERATED EXAMPLEThe break crosses the shingle body; it is not a normal overlap.
FINDING 02Prompt repair

Torn and lifted shingle

Front slope · mid-field · Example location

Visible condition
A shingle has a jagged tear through its body. The broken flap is lifted and curled back, exposing its underside.
Why it matters
The torn tab no longer sheds water as intended. Movement of the loose flap can enlarge the damaged area.
Recommended next step
Evaluate the damaged shingle and the adjoining courses for repairability. Replace the torn material and restore proper fastening and sealing following the product requirements.
What to verify during the repair

Check adjacent shingles for additional tears and disturbance during repair. A cause or date of damage cannot be established from this image.

AI-generated example of a split rubber roof boot with an open gap beside a PVC vent pipe.
IMAGE 03 · AI-GENERATED EXAMPLEThe split and open collar interrupt the seal around the pipe.
FINDING 03Prompt repair

Split plumbing-vent boot

Rear slope · plumbing vent · Example location

Visible condition
The rubber collar has a visible split beside the vent pipe, and a gap is present where the collar should fit around the pipe.
Why it matters
The opening can admit water at a roof penetration. Any moisture beneath the boot remains unverified.
Recommended next step
Have a roofer evaluate the boot, flashing base and surrounding roofing. Use a compatible manufacturer-approved repair or replacement assembly to restore the seal and drainage detail.
What to verify during the repair

Confirm pipe size, boot fit and flashing overlaps. Inspect nearby decking when accessible; do not assume a surface bead of sealant resolves the defect.

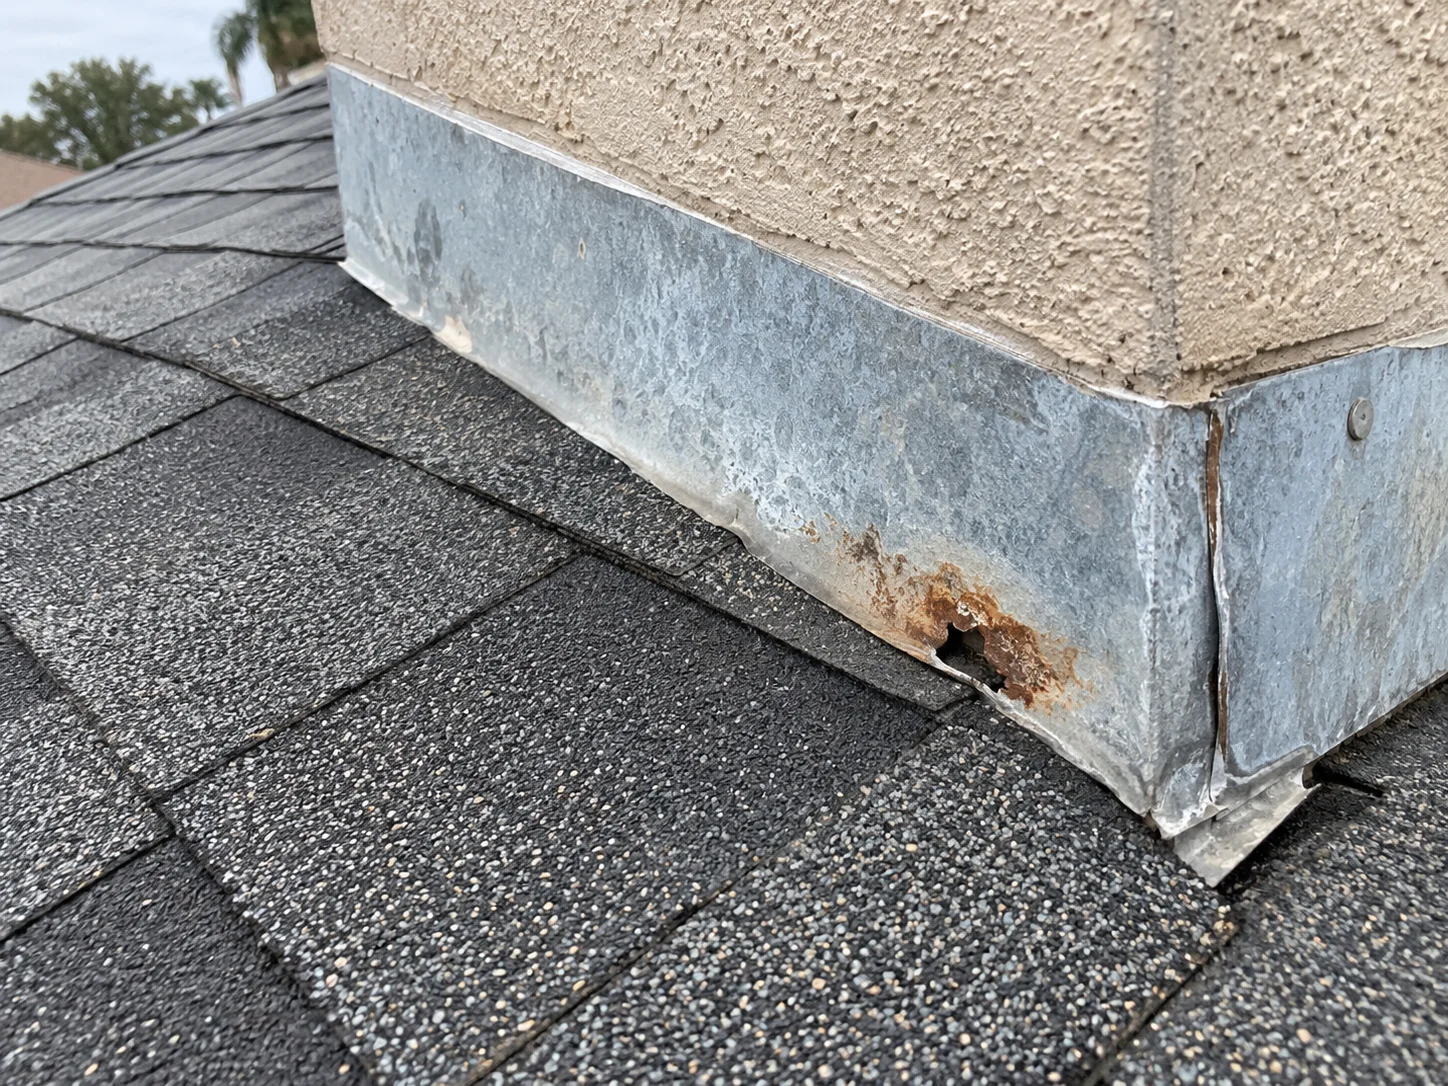
AI-generated example of chimney-base flashing with rust and an irregular perforation.
IMAGE 04 · AI-GENERATED EXAMPLEA hole is visible in the corroded metal near the lower edge.
FINDING 04Prompt repair

Corroded chimney flashing

Rear slope · chimney base · Example location

Visible condition
The exposed chimney-base metal has localized corrosion with a visible rust-through opening near its lower edge.
Why it matters
The perforated flashing is no longer a continuous water-shedding barrier at the roof-to-chimney junction.
Recommended next step
Evaluate the full chimney flashing detail and replace deteriorated sections with compatible materials. Review adjoining overlaps and terminations, rather than treating only the visible rusty spot.
What to verify during the repair

Confirm the extent of corrosion and the condition behind the flashing during repair. Concealed water damage is not established by this image.

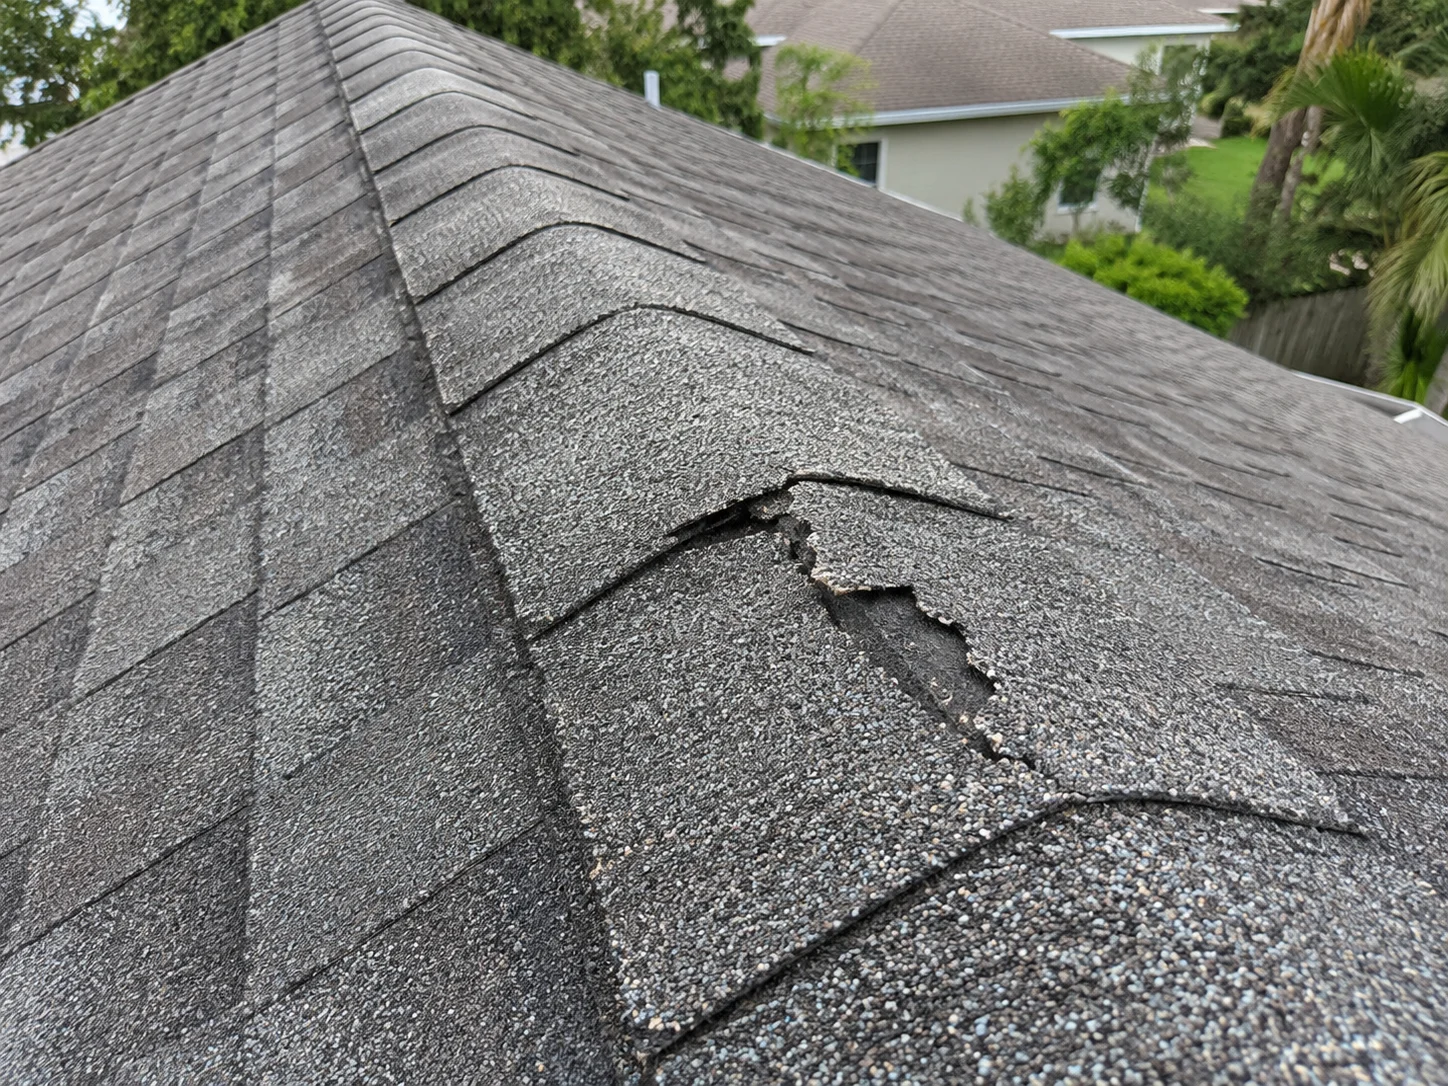
AI-generated example of a broken asphalt ridge cap with a jagged split and missing material.
IMAGE 05 · AI-GENERATED EXAMPLEThe jagged break crosses the cap and exposes a darker layer.
FINDING 05Prompt repair

Broken ridge-cap shingle

Main ridge · front end · Example location

Visible condition
A ridge-cap shingle is split across the crest and has missing material. A darker underlying layer is visible through the damaged area.
Why it matters
The ridge covering is interrupted at a high, exposed part of the roof. The opening warrants review of the ridge assembly beneath.
Recommended next step
Evaluate nearby cap shingles and any ridge-vent components. Replace damaged cap material with a compatible system and restore fastening and overlaps to the product requirements.
What to verify during the repair

Check whether damage is isolated or repeated along the ridge. Document the repaired cap and any additional findings before closing the work.

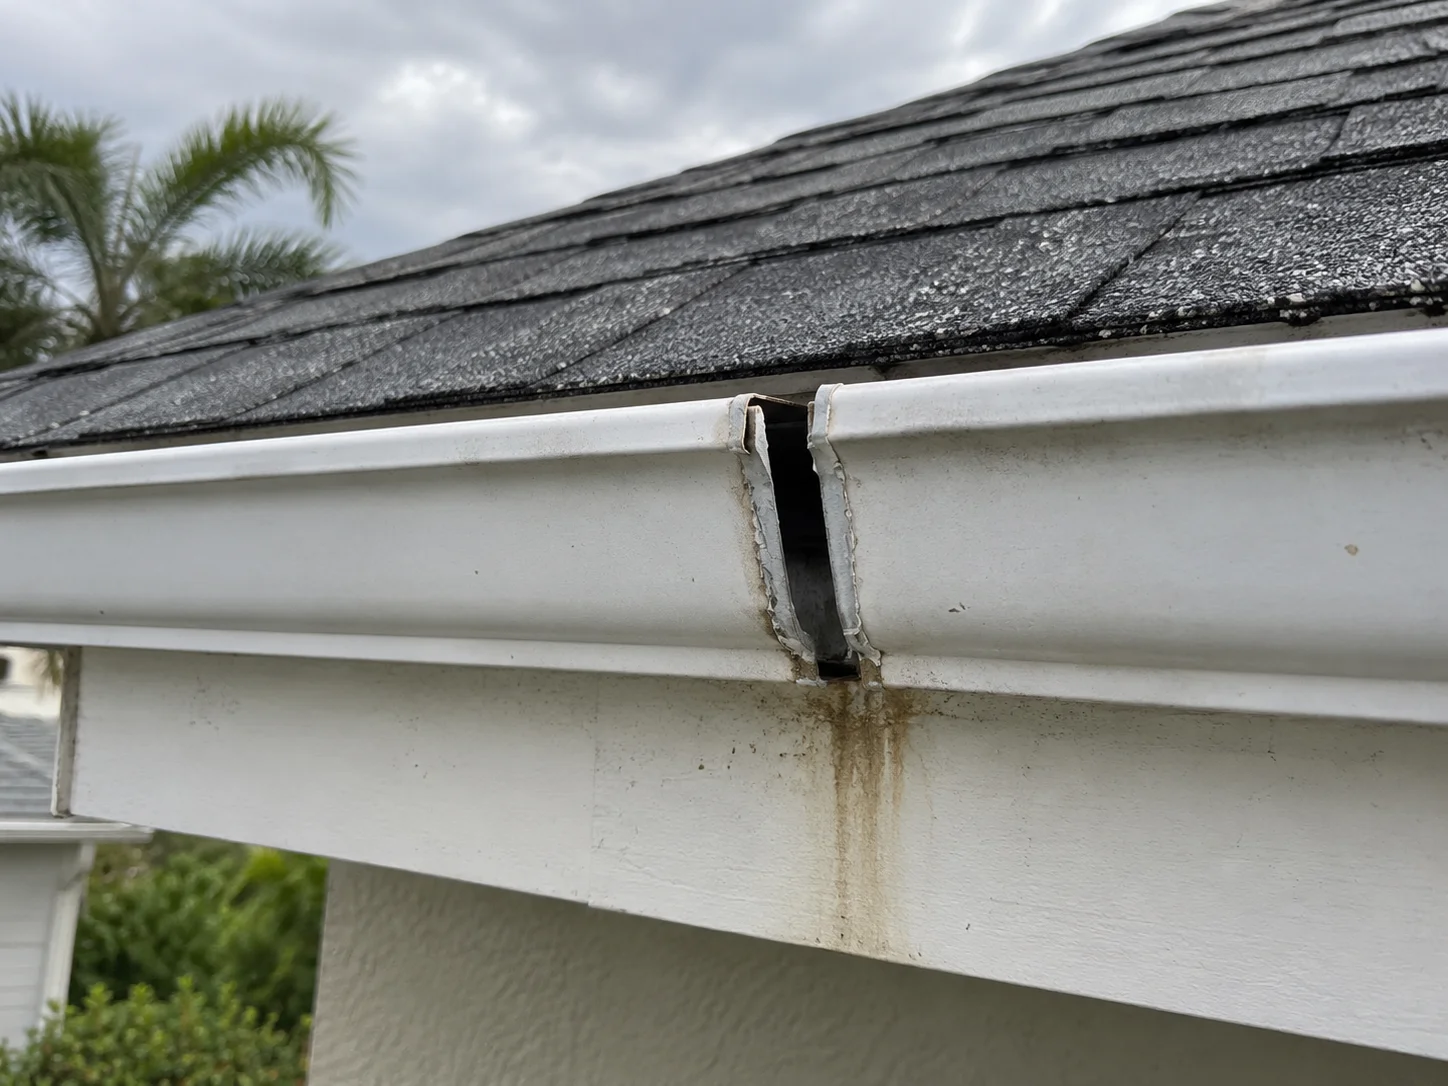
AI-generated example of a separated white gutter splice with staining on the fascia below.
IMAGE 06 · AI-GENERATED EXAMPLEThe open splice and staining below it identify the area to investigate.
FINDING 06Scheduled repair

Separated gutter joint

Front eave · gutter splice · Example location

Visible condition
Two gutter sections have separated at a splice. The seam is visibly open, and staining appears on the fascia below it.
Why it matters
Runoff can escape at the joint instead of reaching the downspout. The stain alone does not prove that the fascia is decayed.
Recommended next step
Repair or replace the failed joint, check nearby supports and gutter alignment, and inspect the stained fascia. Confirm drainage after the repair with a controlled check.
What to verify during the repair

Record whether the joint holds water and whether the fascia is sound when inspected. Revise the scope if concealed damage is found.

TURN THE FINDINGS INTO A PLAN

Start with the openings.
Define the scope.

For the conditions illustrated here, the first step would be a roofer’s assessment of the exposed roofing and failed flashing details. The extent and repairability need to be confirmed before pricing.

  1. Address the roof defects. Evaluate findings 01–05 promptly and discuss temporary protection if permanent work must wait.
  2. Repair drainage. Restore the gutter joint and check the stained fascia and drainage performance.
  3. Document completion. Keep repair photos, materials used, and any newly discovered conditions with the property record.

YOUR PROPERTY. YOUR ACTUAL FINDINGS.

Get your free inspection
and written report.

We’ll document what can be assessed and explain the next steps.

Request your free report